Title: How to Test Ceiling Fan Coils: A Step-by-Step Guide
Description:
In this comprehensive guide, we will show you how to properly test your ceiling fan coils to ensure efficient operation and prevent breakdowns. We understand the importance of a well-functioning ceiling fan, especially during the hot season, and we don't want you to be inconvenienced by a malfunctioning one. We have put together all the necessary steps to make the process easy and stress-free for you.
Introduction
Are you tired of constantly experiencing breakdowns with your ceiling fan? Have you noticed that it doesn't work efficiently as it should? The problem may lie with the ceiling fan coil. In this article, we will provide you with insights on how to test your ceiling fan coils, to help you keep your fan running smoothly for years to come.
Step 1: Isolate the Power
Before conducting any test, it is important to turn off the power supply. Ensure that the circuit breaker is off or, if your fan has a wall switch, turn it off. It is also advisable to label the circuit breaker so that no one accidentally turns it on while you work on the fan.
Step 2: Gain Access to the Ceiling Fan
To test the ceiling fan coil, it's important to locate the motor housing. Depending on the model of your fan, this may require you to remove some screws or bolts. Make sure to keep the screws in a safe place, so you don't lose them.
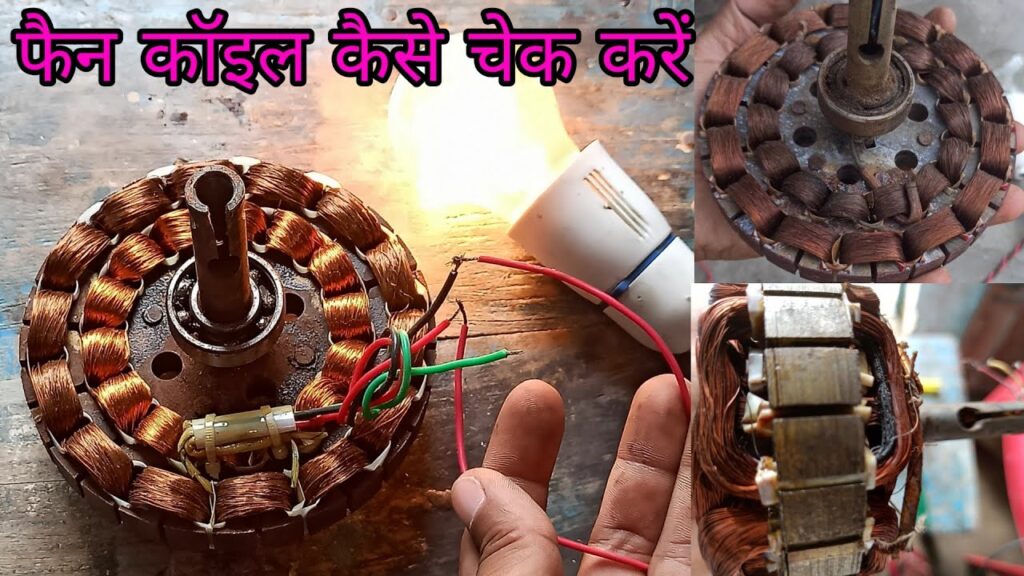
Step 3: Inspect the Ceiling Fan Coil
The ceiling fan coil is located within the motor housing. First, inspect it visually for any signs of physical damage such as cracks or bulges. If you notice any, this could indicate that the coil has burnt out completely, and you might have to replace it.
Step 4: Check the Electrical Continuity
Using a multimeter, set it to the proper range, and place the probes on the two ends of the ceiling fan coil. If you get a reading of zero or a high reading, this means the coil is either completely burnt out or has faults that might affect how well your fan operates. On the other hand, if you get a low reading, the coil is working correctly and is ready to be put back into operation.
Step 5: Replace the Ceiling Fan Coil
If you determine that the ceiling fan coil is faulty, it's best to replace it. Most coils are easy to find, and you can purchase them online or from your local hardware store. Always ensure that the coil is the proper size and style for your ceiling fan before replacing it.
Conclusion:
Testing your ceiling fan coils regularly is critical to prevent breakdowns and ensure efficient operation. By following the steps outlined in this guide, you'll be able to identify any issues and fix them before they become major problems. Don't let a faulty ceiling fan ruin your summer. Use this guide to ensure that your fan is running smoothly all season long.
Additional Tags and Keywords: ceiling fan coil testing, how to test ceiling fan coil, testing ceiling fan coil, ceiling fan maintenance
Hashtags: #ceilingfan #ceilingfancoil #ceilingfanmaintenance #ceilingfantesting #homeimprovement