
Heat shrink tubing is a versatile and simple solution that can significantly improve the insulation protection, sealing, and aesthetic appeal of your equipment. In this article, we will discuss the benefits of heat shrink tubing and how it can be effortlessly installed using a heat shrinking machine.
Heat shrink tubing is a type of thermoplastic material that, when heated, shrinks in size and conforms to the shape of an underlying object. This creates a snug and protective covering that can be used in a variety of applications. The installation process is straightforward, quick, and can be done with the help of a heat shrinking machine.
There are various types of heat shrink tubing available in the market, each designed for specific applications and requirements. When selecting the right heat shrink tubing, factors such as the diameter of the object to be covered and the environmental conditions it will be exposed to should be considered.
One of the primary benefits of using heat shrink tubing is its ability to provide insulation protection. Whether you are working with electrical wires, cables, or any other components that require insulation, heat shrink tubing can offer an additional layer of protection. It prevents moisture, dust, and other contaminants from coming into contact with the underlying object, safeguarding it against potential damage.
Moreover, heat shrink tubing aids in sealing. When the tubing is heated and shrinks, it creates a tight seal around the object, preventing any leakage or seepage. This is particularly useful in applications where liquids or gases need to be contained within a specific area, ensuring that there is no disruption in operations due to leaks.
Another advantage of heat shrink tubing is its ability to improve the aesthetic appeal of equipment. The tubing is available in a range of colors and finishes, enabling you to choose the most suitable option for your equipment. This not only makes your equipment look more professional and neat but also helps with easy identification and differentiation of various components.
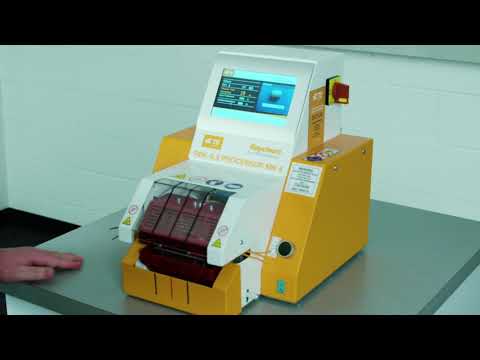
Now, let’s dive into the process of installing heat shrink tubing using a heat shrinking machine. A heat shrinking machine utilizes controlled heat and pressure to shrink the tubing onto the object effectively. The process generally involves the following steps:
1. Measure and cut the heat shrink tubing to the required length. It is important to choose the appropriate size so that it fits snugly over the object without any gaps.
2. Slide the cut tubing over the object that needs to be covered. Ensure that it is positioned correctly and there is enough tubing to cover the entire area.
3. Place the object with the tubing onto the heat shrinking machine. Make sure it is securely held in place.
4. Activate the machine, and the heat will cause the tubing to shrink and conform to the shape of the object. The machine applies controlled heat evenly, ensuring that the tubing shrinks uniformly, without any distortions or irregularities.
5. Once the shrinking process is complete, remove the object from the heat shrinking machine and allow it to cool. The tubing will retain its new shape, providing a secure and protective covering.
In conclusion, heat shrink tubing is a versatile and easily installable solution that offers numerous benefits, including insulation protection, sealing, and enhanced aesthetics. By utilizing a heat shrinking machine, the installation process becomes even more efficient and precise. Whether you are an engineer looking to improve the insulation of electrical components or a company owner concerned about sealing and aesthetics, heat shrink tubing, along with a heat shrinking machine, is an excellent choice. Upgrade your equipment and ensure its longevity by incorporating heat shrink tubing into your installation practices.
Shrinking Machine
“Efficient Heat Shrink Tubing Installation: Simplifying the Process with Heat Shrinking Machine”