How to Pack Packages with Steel Band: A Comprehensive Guide
When it comes to packaging, ensuring the safety and security of your goods is of utmost importance. One of the most effective ways to accomplish this is by using steel banding. In this article, we will explore how to pack packages with steel band, taking you through a step-by-step guide to help you streamline your packaging process. So, let’s dive right in!
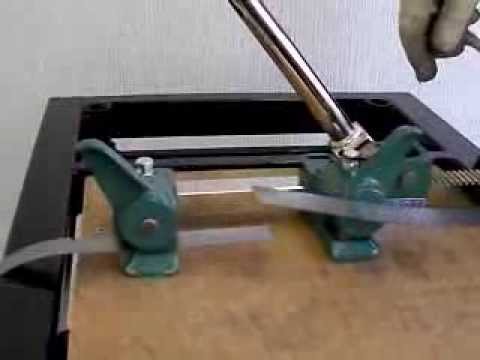
Before we get started, it’s essential to have the right equipment at your disposal. In this how-to guide, we will be referring to the Plastic Bagging Machine and Packing Machine No. 70 (Stretcher & Sealer) as our primary tools for packaging with steel band. These machines are designed to simplify the packaging process and provide reliable results.
Step 1: Prepare the Package
Before you begin using the Plastic Bagging Machine and Packing Machine No. 70, ensure that your package is properly prepared. Make sure the items inside are neatly arranged and organized. If necessary, use fillers to prevent any movement during transit. This will help you achieve a compact package, making it easier to secure with steel banding.
Step 2: Choose the Steel Band
Select the appropriate steel band for your package. The thickness and width of the band will depend on the weight and size of the package. It’s essential to choose a band that can withstand the tension required to secure your package effectively. You can find a variety of steel bands available in the market, so make sure to select the one that best suits your needs.
Step 3: Position the Package on the Plastic Bagging Machine
Now it’s time to position the package on the Plastic Bagging Machine. Place the package securely on the platform, ensuring that it is centered. This will help in achieving a balanced and stable setup.
Step 4: Start the Packaging Process
Once the package is in place, it’s time to initiate the packaging process. Tap the handle and tilt it down first, ensuring both claw levers are in an open position. This will allow you to easily feed the steel band through the openings.
Step 5: Insert the Steel Band
Take one end of the steel band and insert it through one claw lever, ensuring it goes underneath the package. Pull the steel band until you have enough length to secure the package adequately. Repeat this step for the other end of the steel band, making sure it passes through the other claw lever.
Step 6: Tighten the Steel Band
To secure the package effectively, you need to tighten the steel band. Begin by pressing the foot pedal to activate the Plastic Bagging Machine. This will close the claw levers, firmly holding the steel band in place. As the claw levers close, the steel band will be tensioned, ensuring a secure seal around the package.
Step 7: Cut the Excess Steel Band
Once the steel band is securely in place, you can trim any excess length using the built-in cutter. This will give your package a neat and professional appearance, eliminating any loose ends that may pose a safety risk during handling.
Step 8: Inspect and Seal the Package
Finally, take a moment to inspect the package, ensuring that the steel band is tightly secured around it. If any adjustments are needed, use the appropriate tools to make them. Once you’re satisfied with the packaging, seal the package using any preferred method, whether it be heat sealing, adhesive tape, or any other suitable technique.
And there you have it – a comprehensive guide on how to pack packages with steel band using the Plastic Bagging Machine and Packing Machine No. 70. By following these steps, you’ll be able to package your goods securely and efficiently, ensuring their safe arrival at their destination.
As you can see, the process of packaging with steel band doesn’t have to be complicated. With the right equipment and a systematic approach, you can streamline your packaging process, saving time and effort. So, why not give it a try and experience the benefits of steel band packaging for yourself?
Bagging Machine
“Efficient Packaging Solutions: Discover the Stretcher & Sealer and Plastic Bagging Machine”

