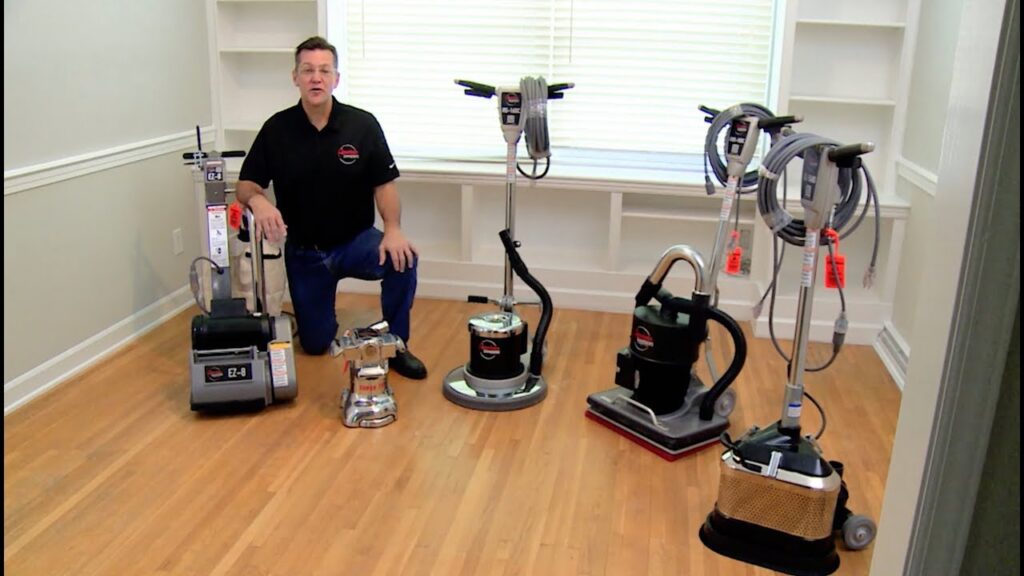
Wood floors can greatly enhance the aesthetic appeal and value of a home. However, over time, they may start to show signs of wear and tear, requiring a sanding and finishing process to restore their beauty. For homeowners who are new to this process, it can be quite overwhelming. But fear not! In this article, we will guide you through a step-by-step tutorial on how to use various wood floor sanders and apply the finish, so you can revitalize your beloved wooden floors.
To begin with, let us first understand the importance of sanding your wood floors before applying the finish. Sanding helps to remove any imperfections, scratches, or stains from the surface, creating a smooth and even base for your finish. It is crucial to choose the right sander for the job, as different types of sanders serve different purposes.
One popular choice among homeowners is the orbital sander, which is renowned for its versatility and ease of use. The orbital sander operates by simultaneously spinning and vibrating the sandpaper, providing a smooth and consistent sanding action. It is ideal for both beginners and experienced users due to its user-friendly design.
Before we delve into the step-by-step process, it is essential to equip yourself with the necessary safety gear. These include safety goggles, a dust mask, and ear protection. Safety should always be a priority when undertaking any DIY project.
Step 1: Prepare the room
Begin by clearing the room of any furniture, rugs, or other obstacles. This will allow you to have a clear workspace and prevent any potential damage to your belongings. Additionally, ensure that the floor is thoroughly swept and free of any dust or debris.
Step 2: Start with a coarse grit sandpaper
Attach a coarse grit sandpaper to your orbital sander. The level of coarseness will depend on the condition of your wood floors. For heavily damaged or uneven surfaces, opt for a lower grit number, such as 40 or 60. The coarser grit will help to remove deep scratches and imperfections efficiently.
Step 3: Sand in the direction of the grain
Hold the orbital sander firmly with both hands, ensuring a comfortable and secure grip. Start sanding in the direction of the wood grain, moving the sander in a smooth and consistent motion. Avoid applying excess pressure, as it may result in uneven sanding or damage to the floor. Remember to overlap each pass slightly to ensure even coverage.
Step 4: Repeat with finer grit sandpaper
Once you have completed the initial sanding with the coarse grit sandpaper, switch to a finer grit. This will help to further smoothen the surface and prepare it for the finishing process. Gradually work your way up to a higher grit number, such as 100 or 120, until you achieve the desired level of smoothness.
Step 5: Remove the dust
After sanding, it is crucial to remove any dust or particles before applying the finish. Use a vacuum cleaner or a soft brush to eliminate the debris from the surface and corners of the room. Ensure that the floor is completely clean and free of any contaminants.
Step 6: Apply the finish
Now that your wood floors are beautifully sanded, it is time to apply the finish. There are various options available, such as oil-based polyurethane, water-based polyurethane, or penetrating oil. Choose the finish that best suits your preferences and needs.
Using a brush or roller, apply a thin and even coat of the finish, working in the direction of the wood grain. Allow the first coat to dry thoroughly before applying subsequent coats. It is recommended to apply at least two to three coats for optimal protection and durability.
Step 7: Final touches
Once the final coat has dried, inspect the floor for any unevenness, drips, or imperfections. Use a fine-grit sandpaper to lightly sand any areas that require touch-ups. Clean the surface once again to remove any dust created during the sanding process.
In conclusion, sanding and finishing wood floors can be a rewarding and transformative project for homeowners. By following this step-by-step tutorial, you can confidently use various wood floor sanders and successfully revitalize your floors. Remember to prioritize safety, choose the right sander for the job, and apply the finish with precision. With a little patience and effort, your wood floors will regain their former glory, leaving you with a beautiful and inviting space in your home.
**Note: The Orbital Wrapper for Long Products mentioned in the title is unrelated to the content discussed in this article.
Orbital Stretch Wrapper
“Mastering the Art of Sanding and Finishing Wood Flooring: A Guided Tutorial on Achieving Stellar Results with an Orbital Wrapper”


